Hello crafty friends, Martha Lucia here to share with you a complete selection of cards created with flowers. All of these are flowers from our stamp sets and you can combine, cut and edit these to create your own designs. Let me show you my first card:
For this card I used the stamp set Humming Blossom and a watercolor technique. Creating this was very easy:
1. Cut a layer of watercolor paper.
2. Ink an acrylic blog with four different colors of classic Ink. I used Wild Wasabi and Pear Pizzaz for the upper part and Blue Sky and Pool Party for the lower part.
3. Spray the block with water and put the watercolor paper over the acrylic block.
4. Remove the paper and let it dry. If you want to speed up the process, you can use the heat tool.
5. Take the branch flower image from the stamp set Humming Blossom and ink it with markers. I used the colors Crushed Curry, Garden Green and Rose Red.
6. Spray the stamp with water and stamp over the watercolor background. Let it dry.
7. Stamp your sentiment with Paris Dusk Memento Tuxedo Ink.
8. Decorate with a die cut from the Funky Shapes Die Set. I used gold glimmer paper for this purpose.
9. Cut the base of your card and assemble it.
My second card is a Clean and Simple model that I made using the Dahlias Layered stamps and coordinating die cuts. These flowers are totally gorgeous and this is definitely one of my favorites sets.
Creating this card was very easy. This is a one layer card created in Whisper White card stock.
1. Stamp the solid images of dahlias, large and small, using Sky Blue and Bermuda Bay Classic Ink.
2. Use Stamp-a-magic to stamp over some dahlias from the previous step to make some corresponding flower with lines using Night of Navy Classic Ink.
3. In another piece of card stock, stamp the solid image of the dahlias using Pool Party Classic Ink, and the detailed images with Night of Navy and Island Indigo Classic Ink.
4. Cut the flowers stamped in the previous step using the corresponding die cut and paste over the stamped background using dimensionals or zapdots.
5. Stamp the sentiment from the stamp set Fiends Forever using Night of Navy Classic Ink.
6. Finalize the decoration by adding some silver sequins.
My last card is a combination of elements: decorated paper, word die cut and a little flower. This flower is from the stamp set Flower in a Jar. Take a look at my card:
The base of this card is Rose Red and the second layer is Whisper White. Creating this was very fun:
1. Cut the second layer using whisper white card stock and stamp the rose from the stamp set Flower in a Jar several times in diagonal lines using three different colors of Memento Ink. I used Grape Jelly, Lilac Posies and Lulu Lavender.
2. Cut the third layer using decorated paper and create a diagonal angle.
3. Match the border and cover it with a tiny piece of rose red card stock.
4. Tie several loops of natural twine and create a bow.
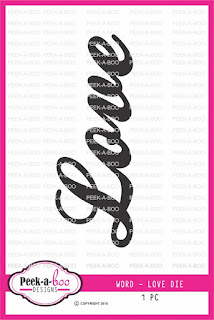
5. Cut the Love die word in a coordinating color and paste over the tiny border.
These are the products that I used in today's creations:
All of these are available in our store in you will find a lot of more to use these ideas in your own way!
See you soon with our new release!


Awesome Martha :) I loved the last design one with the patterned papers
ReplyDeleteBeautiful cards Martha !
ReplyDeleteWow pretty cards! I love the last one, it is so beautiful :)
ReplyDeleteBeautiful cards
ReplyDeletebeautiful cards martha i like your layout of the cards...
ReplyDelete